Thursday, March 31, 2011

Vegan Milk Part IV: Flax-tastic!

Other vegan milks:
Part I: Hemp
Part II: Almond
Part III: Rice


Now that I have made three somewhat decent non-dairy milks, I decided to try something a little different and make a flax seed milk. It seemed like to make a non-dairy milk you really just need a seed or nut, soak it overnice and then process with water and strain. The hemp and almond milk were really good. The rice milk was not quite perfect the first time I made it with short grain rice, but switching to long grain and it worked really well.

I figured I should start experimenting. My experiment today was flax seed milk. Now looking back, I should have saw this happen. When I soaked the flax seed overnight, the result was very similar to a flax egg. (more on flax eggs here). It was gooey and sticky and immediately thought that it probably wouldn't make the best milk.
©iStockphoto.com/Eric Naud

However, I followed through and finished the recipe. Here it is:

Flax Milk
  • 1/2 cup flax seeds
  • 3 cups water
  • dash of salt
  • 1 tsp of maple syrup
As with the other milks, take your seeds and soak them for 8-12 hours. Next, drain them and add them to your blender with the water, salt and maple syrup. Blend on high for 3-4 minutes or until it is smooth. While it's blending set up the straining system (Large bowl with a strain resting inside, cheese cloth covering the inside of the strainer.

pour the flax mixture through the cheese cloth and let it strain. You can pull up the corners of the cloth and squeeze the liquid through. Once strained, test and adjust the sugar and the add more water if it is too thick.

So, I am undecided on this one. I found the end result to be a bit sticky. It would not be a milk I would put on cereal or just drink a glass of. On the other hand, this was really cheap to make (About $2 to get enough seeds to make a litre of milk) and it worked well in my smoothie and in a muffin recipe I made.

I guess in the end it depends on what you use milk for. So far, if I wanted a milk that was an all-purpose and could drink a glass of, bake with, and use in a cereal, the Almond is my favourite so far. However, I really use my non-dairy milks for smoothies more than anything and it has been fun switching it up. The flax milk provides a lot of nutrients at a low cost. It's high in omega-3 and has been thought to lower cholesterol. It is high in fibre and people think that it has disease fighting power! It has a unique taste and was a great addition to my morning smoothie. So if you can get over the funny consistency, give this one a try!

Up next in the non-dairy milk... Sunflower seed!

Saturday, March 26, 2011

Vegan Risotto, Take One, Take Two

This week, I decided to try out vegan risotto. My first time making risotto ever and from what I have read, it is not really hard to make, just takes a little TLC to get it right. I thought I had aborio rice hanging around in my cupboard for the longest time and I figured, what better time than now to give it a try!

I am going to just come out and confess now. I made a few mistakes. I did not follow a recipe. I did not use the correct rice and I did over cook it a little bit. Let's start at the beginning...

Lesson number 1 - Always, always check that you have all ingredients before you start cooking. I was sure that I had aborio rice in my cupboard. I have seen it there so many times and every time I think, I should make a risotto. Now that that time finally came, the rice was nowhere to be seen. Had I checked that I had all my ingredients before starting; I could have gone to the store, or just put this one on hold. Because I didn't, I had to make do with what I had, which was long grain brown rice. This brings me to my second lesson learned...

Lesson number 2 - If you do not have the correct rice for risotto... do not use long grain rice! I really should have done a bit of online searching on this one. I knew as I was making the decision that it did not feel right. As it turns out, you really shouldn't make risotto unless you have the correct rice. If you must make a substitution, you need a short grain rice. Long grain takes much longer to cook and it just doesn't have the gluten to get the correct texture. In the end, you'll just end up with a labor-intensive pilaf.

Lesson number 3 - Make your own broth. I thought that this one was something that would be like most recipes. yes, it is nice if you have the time to have a hearty home-made broth to use, but in a pinch a store-bought broth will be just fine. I felt that the final product was much too salty. And this is coming from a person that loooves salt. If I did this recipe again, I would definitely make my own broth.. or at the very least dilute the store bought one a little bit.

Now after all these lessons, I did come up with a decent risotto and even the botched attempt that I made was not too bad. It just wasn't risotto. I urge anyone that has not made a risotto to give it try. There is something really relaxing about turning so much attention to your food. I turned on some blues and silenced the phone and actually turned off the world around me. It was truly a nice zen moment which happens so rarely these days.

Here is the recipe:

Wild Mushroom Risotto
Serves about 6, takes about an hour
  • 8 - 10 cups of vegetable broth, homemade if possible
  • 1 Tbsp olive oil
  • 1 cup of rice
  • 1 small onion, chopped (I used a red one)
  • 1/2 cup chopped carrots
  • 1/2 cup chopped celery
  • 1 cup (or more) of mushrooms (I used a variety pack from the farmers market. Use what ever your faves are)
  • 1/4 cup of chopped sun-dried tomato
  • 2 Tbsp on nutritional yeast flakes or vegan Parmesan cheese (optional)
  • 1-2 Tbsp of chipped parsley, for garnish

First get your broth on the stove and heat it over medium low heat so it is simmering. While waiting for the broth to heat, prep your veggies and have them ready. Take a large pot and heat over medium heat and add the oil. Once the pan is hot, add the onion and stir it around for a couple minutes, until it is translucent. Next add the carrot and celery and cook another 2-3 minutes. Add about 1/2 - 3/4 cup of the mushrooms and cook until they begin to soften.


If the pan is a bit dried, add a little more oil. Now, add the rice and stir really well. Let the rice toast in the pan for about 2-3 minutes. Once the rice is well coast and a bit toasted pour 2 ladles of the vegetable broth and start stirring.


The trick to a good risotto is to keep it moving and never let the pot go dry. Continue to add a ladle or two of broth once most of it is absorbed. Continue to do this until all the broth is absorbed into the rice. When you pour the last bit of broth in, add the remainder of the mushrooms, the sun-dried tomatoes and stir until the broth is all absorbed. Test the rice and if it is still not cooked, add more broth or water and continue to stir.

Finally, add the nutritional yeast, if you are using it and the parsley and serve immediately with a good wine and some greens.

After all that stirring, you have earned it!

Thursday, March 24, 2011

Vegan Milk Part III: Rice

Vegan Milk Part I: Hemp

Vegan Milk Part II: Almond

I am very excited to be on part three of the vegan milks. Unfortunately, my camera died last night and sadly I have no pictures now until further notice. Sad.. yes, but really milks seem to look pretty similar and the way they are made follows a pretty simple formula. The only thing that seems to change is whether you need to soak or cook down the grain, nut or seed before you pulverize and strain.

Photo Credit: http://www.thaitable.com
I thought this would be my last vegan milk to try, but I realized that with such a basic formula; I can really take anything I want and attempt to make a milk with it. The mad scientist within me is rejoicing!

Before I get carried away with what is coming up, let's get to the next vegan milk on the menu: Rice

Rice milk seems so easy. I figured you just soaked and processed like the almond milk. I found out, however, this is not the case. Most of what I read said to cook the rice from anywhere from 1 - 3 hours and cool it before making the milk. So after much reading, I decided on the following recipe.

Vegan Rice Milk Makes about 1 litre
  • 1/2 cup rice (White or brown, long grain preferred. I used white)
  • 6 - 6 1/2 cups water
  • 1/2 tsp vanilla or a vanilla bean
  • 1-2 Tbsp maple syrup, brown rice syrup or agave
  • pinch of salt
To make this recipe, set aside some time. First take your rice and combine with the water in a large pot. Bring it to a boil and then simmer on low heat for one hour. After the hour is up, give it a good stir, add the vanilla and stir again. Cover and let it cool off completely.

once cool pour the mixture into your blender and blend for 1-2 minutes on high. While it is blending set up your straining station. Have a large bowl ready with a strainer resting on top. Cover the strainer with cheese cloth with enough that you can pick up the corners.

Next, pour the mixture through the cheese cloth and strainer. Pick up the corners and squeeze all the liquid out. Once all the liquid is in the bowl add the maple syrup and more water if it is too thick. Stir well and put int he fridge to chill before serving.

Photo credit: http://www.milkworld.info
Now, before you go making this I have to share some concerns I have. First this was the first time that there was no sediment left over when I strained the milk. The milk on first glance seems a bit glutenous and a little thick. I added another cup of water to thin it out a bit. Second concern is that using white rice seems to make it sweeter then I was hoping. I think thinning it out with the water will help though.

I am leaving it overnight to see how it does. Stay tuned!

UPDATE: Well it is morning now and the milk is icy cold. The consistency is still not quite right. It is a bit too thick, but I think anymore water would make it lack flavour. The taste is right, however. I know I am close... Perhaps using white rice was the mistake? I really only used it because I have a big bag of white and don't really eat it. I am a brown rice girl all the way.

On the plus side, this recipe made more milk than the others did and I don't think the straining station was necessary as it didn't really catch anything.

Stay tuned for another update, I am going to redo this one with Brown rice and see what happens.

Sunday, March 20, 2011

Slow Cooker Porridge

Last night, I stayed in and it was fabulous. I watched a couple bad movies, hung out with the guinea pigs, read, and went to bed at a somewhat reasonable hour. I was bored out of my mind!! So, around midnight last night, I started looking through cookbooks to find something special to make for breakfast.

I was thinking of vegan quiche, or french toast... Then I came upon a recipe for an Irish porridge that sounded so good that I had to try it.

This is a slow cooker recipe and I found it in this cookbook called the Little Vegan Slow Cooker.  I have tried a couple things out of this book before and they were awful, but this sounded so simple, I figured you couldn't go wrong. I made a couple of additions to the recipe because it seemed a bit lacking.

Slow Cooker Porridge
  •  1 cup steel cut oats
  •  4 cups water
  •  1/2 cup brown sugar, plus extra for topping
  •  1 Tbsp cinnamon
  •  1/2 tsp salt
  •  1 cup of fruit
  •  vegan margarine
  •  non-dairy milk
Put the oats, water, brown sugar and cinnamon into the slow cooker and stir really well. Cook on low for 8 to 10 hours.

Good to bed.

In the morning, give the porridge a stir and add the fruit (I used canned peaches) and let cook for 15 more minutes. Serve with a bit of milk (I used my homemade almond milk), vegan margarine, brown sugar and whatever else you think may work.

It doesn't take the prettiest picture, but the taste was excellent!

The original recipe did not have the fruit in it or the salt. You can make it without, but I think the fruit is a great addition. There is a quite a bit of sugar in this, so I wouldn't say it is the most healthy, but it is warm and filling. A good way to start the day without any real effort in the A.M.

The slow cooker is the lazy person's best friend. Dump things into it, turn it on and that's it! Before I went vegan, I used my slow cooker all the time. Most of the recipes I had were very meat-based, so when I switched to a vegan diet, I sort of stopped using it. I think it is time to start using it again.

Vegan Milk Part II: Almond Joy!

Click here for Vegan Milk Part I

With the hemp milk being a success, I was stoked to try the next non-dairy milk: almond. I had done a bit of reading up on almond milk and found a recipe that promises the milk won't separate which is great. Most, if not all raw milks do separate if they are left to sit in the fridge. The hemp milk did, but a quick shake before serving is the easy solution to this.


Almond milk is also really easy to make and a very similar process to making the hemp. There is a bit more work involved because you need to remove the skins from the almonds and soak them for a long time. I wouldn't say it was labour intensive, but I couldn't just whip up a batch of almond milk on the fly.

Even so, I liked this milk a lot. It was rich, smooth and creamy. I found it was much closer to drinking animal milk, so if you are going for something that is close to the consistency of dairy milk, this may be the drink for you.

Homemade Almond Milk
- about 1 to 1 1/2 cups of almonds
- 4 cups of water
- dash of salt
- 2 tsp maple syrup
- cheese cloth

First, you need to blanch the almonds. Pour a large bowl of icy water and set aside. Boil 2 cups of water and then add the almonds. Let boil for about 1 min and be careful not to over cook. You want the almonds to not go soft. Remove from heat, strain and dump the almonds in the cold water bath and let sit a couple of minutes.


Next, you want to remove the skins from the almonds. Super easy to do. Strain the almonds out of the cold water and put back in the bowl. Have a garbage bowl handy. Take an almond and pinch and wiggle it a bit in your fingers. The skin should come right off. Skin the rest of the almonds.


Now cover the skinned almonds with water and let sit for 8 - 12 hours. Strain the almonds from the soaking water and put in a blender. Add 2 cups of water, sweetener and the salt and blend the crap out of it (2 - 3 min on high). While blending, set up the straining station. Have a large bowl that holds 6 + cups of water and rest a strainer in it. Put cheese cloth in the strainer so that the edges hang over a bit.

Once the mixture is blended, pour it through the cheese cloth and then squeeze as much liquid as you can out of it. Once all the liquid is drained, put the pureed almonds in the cheese cloth back into the blender and and add 2 more cups of water and blend again for 2 - 3 minutes and repeat the straining process. If the milk is too thick, then add more water.

This recipe makes consistency of a 2% milk.


Now, if you want to try to make the milk not separate, pour the almond milk into a large pot and simmer for 15 minutes. Then pour into container with a tight seal and chill.

That's it! See how this is a bit more labour intensive? really there is nothing difficult about this recipe, but you need to be thinking ahead. So far this has been my favour of the two. I think the homemade recipe is much better than store bought whereas the hemp was on par with store bought.


Oh, and if you want, save the residue that is in the cheese cloth. If you can dry this out and put it back int he food processor, you will have almond flour! I imagine this will make good cookies. I saved mine and will keep you posted.


I will definitely be making this again. I think next time, I might add some cinnamon to it. I think that would be an amazing addition.

OK - Coming up next... Rice Milk!

I am looking for some other non-dairy milks to attempts, so if you know of any please comment!

Saturday, March 19, 2011

A trip to the farmers market

Nothing better then a chilled-out Saturday.. Especially after a late Friday night!  I was planning to spend the day at home devoted to catching up on the blog and maybe watching some movies. Instead, I got out to the farmers market before 11:00 am (a miracle for me on a Saturday)! There is so much more available when you get out to the market before noon. Normally when I get to a farmers market most of it is sold out, so I think it can be assumed that I came home with a big bag full of treats!


While it was great to get out early... It makes me wonder why we don't have a night market here? Edmonton has never been night-owl friendly, but maybe it needs to start. I would go.
So, what kind of treats did I find while out and about today?
The first place I hit up was the olive stand. I love olives; they are so packed full of flavour, so salty, and so satisfying. I bee-lined for the stand and what normally is picked over, was completely full of yummy spreads, oils and...Almond-stuffed olives! It seemed like a weird combination, but trust me, this is so good! I don't know if I would put these into a martini, but what a awesome snack! These will be coming to work with me on Monday.


I made my rounds to the fruits and veggies and it was unfortunate that the selection was not the best. I am sure it has something to do with our weather. Even so, I managed to get cucumber and carrots and tomatoes. I have to say it has been a while since I have seen decent tomatoes in the stores. These smelled so good, I let the person selling them know how nice it was to see good tomatoes. She reminded me to stop buying the crappy ones in the grocery store and to buy local.. She is right, they are way better.

Behind the veggie stand was something I have not seen before in the farmers market, a mushroom stand! I couldn't help myself and impulse bought an assortment of mushies. In fact, I don't even know what types were in the basket. They just looked so good and earthy, I figure I will find a use for them. Suggestions so far have been risotto and risotto. I think coming soon will be a post on my first ever attempt at making risotto.

On my way out of the market, I came across a hemp stand. Out of curiosity, I went to chat with the person there. I know very little about hemp, other than you can make a myriad of things with it. I have tried hemp hearts and hemp milk and really liked both. I bought a big container of hemp hearts. The woman at the stand talked about all sorts of things you can make with it. Milk, flour, protein powder.. So I plan to do some experimenting with this. It would be really nice if I could make my own milk. I have been thinking about this one for a while since soy and almond milk are kind of pricey and seem like they should be an easy process.

Thursday, March 17, 2011

Vegan Milk Part I: Hemp

Photo Credit: greenmillet.blogspot.com
Before I was vegan, dropping cow's milk from my diet was one of my biggest fears. I was a cow's milk junkie. I drank easily 4-6 litres a week. I drank it with everything, put it in my coffee, black tea, cereal. I assumed when began the 30 day vegan challenge that I would last maybe a day or two and would never get close to making it a month. I discovered after making the switch that it wasn't milk that I needed so badly. I was just thirsty. I switched milk for water as my go-to drink and it worked like a charm.

Once I had committed to being vegan, I started looking into non-dairy milks to introduce back into my diet. Soy, rice, almond, cashew, coconut, hemp.. the options go on and on, but then I found the drawback.. Vegan milk is really expensive! It was time to look into a cheaper alternative. So here we are... homemade vegan milk.

I wanted to venture into this one slowly since I have never tried it before and I am not sure that I can get the taste to be as good as the pricey store bought products. I was looking for the easiest of the easy to start with and after a bit of research, I think I found it - Hemp milk!
Photo credit: http://www.rense.com/general49/could.htm 

Unlike many other vegan milks, you do not have to soak the hemp prior to processing it. To me, this makes it so much easier because you really just put everything in a blender and the strain it through cheese cloth. Remembering to soak things prior to blending is really difficult for me!

So, let's get to it.. the recipe:

Hemp Milk
  •  1/2 cup shelled hemp seeds or hemp hearts
  •  2 1/2 cups of water (This can be adjusted if you want it thinner or thicker)
  •  1-2 dates (or any other sweetener, maple syrup or agave would work well)
  •  1/4 tsp (or less) of salt
  •  Cheese cloth

Put the hemp hearts and the water into a blender and blend at highest speed for about 2-3 minutes or until it is frothy. Add in the sweetener, salt and if you want a touch of vanilla. Continue to blend for another minute or so. I don't think you can over blend.


Set up a large bowl with a strainer inside it and cheese cloth in the strainer. Carefully pour the milk on to the cheese cloth being careful not to pout to fast. Let the milk strain through and once it slows down, pick up the ends of the cheese cloth and squeeze the milk down and through the cloth. When you get it all strained the cheese cloth will have gritty pulp from the seeds that you can toss out.

The set-up for straining

That's it! Chill it and then test it to make sure the sweetener was enough. I don't like to add too much to milks and find the natural flavour is what should stand out. If the milk is sitting for a while, it will start to separate. Just shake before using. It should last about 3-4 days in the fridge.

Hemp milk has a nutty and very earthy flavour. I find it is really good in coffee and tea, or on its own. I find that many recipes say to steer clear of hemp milk in baking, but I think it would work just fine. It is a bit thinner than a soy milk, but could probably be used anywhere that calls for non-fat.

Hemp milk is a good source of protein (about 5g) and iron. It does not have a lot of calcium in it. One glass has 110 - 150 calories approximately, depending on how much water you use.


Coming up next... Almond Milk!

Monday, March 14, 2011

Debunking the myth: Being vegan is too expensive!

When I first decided to eat a plant-based diet, I was really worried about the cost of food. Walking around the grocery store I would see fake meats that looked small and were really expensive. Recipes I wanted to try had all sorts of spices and ingredients that I didn’t have in stock. I try to keep myself on a $50 a week food budget and it seemed to work when all I ate was ramen noodles, Kraft dinner, and stir-fries. Even before I went vegan, meat was often just too pricey for me.
Switching to a plant-based diet successfully really takes a lot of thought. You need to re-think how to get your nutrients. Like any habit, once you get going it becomes easier and easier. The real tricky part for me was sticking to the budget.

I have been thinking about making this post for a while. A lot of people tell me that being vegan is just too expensive and I needed to go on the record that it is simply not true! Every once in a while I see shows that will feature how to shop on a plant-based diet (Oprah, I am talking about you!). Twice on her show they featured a trip to the grocery store and I was absolutely appalled at what was going into the cart. Faux meats and cheeses, soy ice cream, coconut frozen desserts, frozen meals and plethora of processed goods. Nowhere to be seen was vegetables, whole grains, beans and legumes! If I were to shop like that, I would be spending easily $100 or more in a week.

So, what does the single girl on a budget buy? It is all about strategy. Integral to keeping to budget involves making a meal plan. I am not capable of eating the same thing over and over. Every week I do a meal plan and develop it from two angles:

1.    Take stock of what you have. Do you have veggies left over that need to be eaten? Have a huge bag of rice sitting around? Take an honest look at what is around. Sometimes, I am amazed at what I have sitting around.

After taking stock of what is kicking around the kitchen think about what you can make with it. If you have no idea, Google the ingredients or look them up in the index of a cookbook or two. The more you do this, the more you will be able to think of things that might work. These foods are sort of like freebies. They’re already paid for and often left over from something else, so get creative.

2.      What are you craving right now? I always try to think of a good recipe to make through the week. If nothing comes to mind, take a look at restaurant menus, cook books or blogs. I am sure something will come to mind.
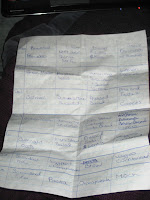
Now that you have two solid recipes, you probably have a good foundation for the meal plan. Develop a chart (Excel has templates, but I always do mine on paper). Slot in your left over recipe on day 1. Most recipes make 3-4 or more servings, so you can also slot it in for lunch the next day and probably one more dinner.
Next, write in the new recipe you are going to make. Plan this one with thought. Don’t put it on a day you know you’re going to be busy. Do the same as the left over meal and slot in the leftovers too.
Remember to track what ingredients you are missing and write them down on the back of the page. Now take a look at what is on the list. What can else could you make with these ingredients? Again, do the research and now you have a third recipe to make which should take care of the end of the week.
The rest of the empty spots I tend to fill with easier things. Salads, soups, sandwiches, etc.  remember to write down ingredients you don’t have as you go. For me, breakfast I keep super simple. Green monsters, cereal, oatmeal are often on the menu. Sometimes I will get a bit creative on the weekends, but let’s be serious. I am not going to be cooking for an hour before work.
Lastly, don’t forget about snacks and dessert. I always try to make one thing in the week and then keep the rest simple. I alternate from sweet to salty and back again.

Here is a sample of my meal plan this week: Sample Meal Plan in Excel

Some tips to stick to budget:
  • Always remember to reuse the ingredients you are already buying
  • Pay attention to spices in a recipe. If money is tight, don't make recipes you do not have the seasonings for, they add up fast!
  •  Stick to the list and then stick to the plan. It’s a bit of commitment, but then food is an important part of life.
  •  Buy just one or two types of greens each week and switch them up. This way they will stay fresh and it will be cheaper for you.
  •  If you have too much left over in a recipe or plan change on you, freeze it. That way you will have frozen meals ready in case you need them.
  • Stay away from buying lots of drinks. I save so much just from not buying juice and pop. Water is really the only drink you need. The rest are treats and if you can’t afford them; don’t get them.
  • Finally – the usual rules, try to buy in season and stick to the perimeter of the grocery store as much as possible. Processed foods are expensive!

Regardless of what your diet is, this is the secret to eating on a budget.

Saturday, March 12, 2011

Mochi Waffles - Vegan, Gluten Free...and Delicious!

This afternoon I was going through some photos on my camera, and came my first try at mochi waffles. I cannot believe I forgot to post about this. It is so, so good! I had read about this in Alicia Silverstone's, the Kind Diet, but was a bit skeptical. Mochi is really good, but I didn't see how it would make a good waffle.

What is mochi you ask? Well, it is a yummy Japanese creation that involves soaking and cooking rice and then pounding it into a block. When you cook it, it melts and puffs up, making odd shapes. I have been eating it for about a year now and tend to pan fry it with a bit of soy sauce and brown rice syrup. It is really easy.. the steps for the basic pan-fried mochi:

First, cut up a block of mochi into 1-2" square blocks while heating a frying pan to medium low heat with a bit of olive oil (about 1 Tbsp). Add the mochi and cover and let it cook for about 4 minutes. Flip the mochi and take a spoonful of soy sauce and pour over top (note, this is going to splatter, so beware nice clothing!). Cover again and cook another 4 minutes.

Check the mochi and it should be all puffed up and melty. If it isn't, then put it back on the heat for another minute or two. Once it is done, transfer to a plate and drizzle brown rice syrup. That's it! Breakfast, or a snack... this is yummy.


OK, back to the real recipe at hand.. Mochi Waffles. I have seen this in the Kind Diet. It is also on the back of the mochi package. Finally, I took my mochi and a few other ingredients for a sauce over to my sister's (I don't own a waffle iron... yet...) and convinced her to give this a try.

Mochi Waffles
*Adapted from the Kind Diet
  •  One package of mochi
  •  1/2 cup of Maple Syrup or Brown rice syrup
  •  1 cup walnuts
  •  Juice of 1/2 a lemon
  •  1 Tbsp of lemon zest (optional)
  •  Strawberries, chopped
  •  Mint, chopped and/or for garnish
First, toast the walnuts in a dry skillet on medium heat and pre-heat the waffle iron. Once toasted, remove from the pan and chop. Next, slice the mochi into strips about 1/4" wide. I found that each waffle requires about 5-6 strips of mochi.Put the mochi on the waffle iron and cook until it puffs up and is a little crispy. The book said about 3 minutes, but I found it needed closer to five. Keep an eye on it.

While the waffles are cooking combine in a small pot the syrup, 3 Tbsp of water, lemon juice and the walnuts. stir over medium heat until warmed.


Put the waffles on a plate and top with the syrup, berries and mint and serve.

Now the book says to use the brown rice syrup, but I found that the sauce was too mild this way and ended up put maple syrup on top the first time. So, judge accordingly based on your sweet tooth.

Monday, March 7, 2011

Udon Bowl - My New Comfort Food

Whenever I am having a bad day, I crave starchy, salty, carb-rich foods. Potatoes, pasta, rice, noodles are all in my top ten. Something about it just makes me feel better. I have been slowly acquiring the ingredients for a good stir-fry or Asian soup and today was the day.

As soon as I finished my big Udon bowl I felt immediately better... Actually, as soon as I finished my seconds. To go with my noodle bowl I made Braised Daikon from the Kind Diet, get the recipe here. I saved the liquids that it cooked in to flavour my Udon noodle bowl broth. If you don't want to make this, flavour the broth with about 1/4 cup of mirin and 1-2 Tbsp of Shoyu.

Cure-all Udon Bowl
- Package of Udon (or any kind) of noodles
- one celery, sliced
- one leek, sliced
- handful of mint leaves
- 2 leaves of bok choy, chopped
- 2-3 kale leaves, chopped
- 2" daikon, chopped
- 1/3 block of silken tofu, chopped
- handful of shiitake mushrooms, chopped
- 2 to 3 Tbsp of miso
- liquids from braised Daikon
- 4 to 5 cups of water
- 1 to 2 vegetable bouillon cubes


Now, I think I have said this before when making something like a noodle bowl or stir fry. Use the veggies that you have. I forgot to include carrots and I think they would have been awesome here. In the world of veggies, there is not much that wouldn't work.  I even thought about throwing in some lima beans, but got scared... next time!

Put water and bouillon cubes in a large soup pot and bring to a boil. While waiting for it to boil, prep the veggies. Once the water is boiling add in the vegetables in order of cooking time. Then add in the noodles and last, add in the tofu. Let it simmer for a while (I simmered it about 15 minute).Add in the reserved liquid from the braised Daikon or add the mirin and shoyu.


Once soup is looking ready take out about a cup of the water and stir into it the miso paste. Take the soup off the heat and add the miso in and stir.  Let it sit for a few minutes and then taste. Adjust seasonings as needed.

I have to admit, I did not really follow the instructions here. I was so tired when i got home, I just threw everything into a pot as soon as the water boiled and crossed my fingers. Surprise - It worked OK! I did end up adding a little bit extra miso to mine because I was craving something salty. I will leave that one up to you.

Something tells me this is going to be one of those things that tastes even better on day two. Can't wait! Thank you Udon bowl, bad day has been kicked to the curb!

One Long Cookie Night! Part Two: As Healthy as Cookies Get

Part one: Not so Healthy Cookies

So cookie night continues. It is late.. Really late and I just finished my last of the cookie recipes. I was planning on doing three types of cookies. I ended up with four. I have done enough quality checks now that I actually made kale chips when I finished! I needed some veggies to offset all the sweetness. Cookies for dinner seemed like a good idea at the time. It still is, but maybe don't have cookies for a midnight snack after.

Before the cookie hangover fully sets in, let's get on to part two of the cookie night. I labelled these as the healthy cookies. I don't know if I would go so far as to ever call cookies a health food, but in the grand scheme of cookies, these two recipes have a few more nutrient dense ingredients so you are getting more than just sugar and flour. I also used two different egg replacers again to give a comparison.

I have to say of all the egg replacers I have now tried, they all do the job as they said, but I think the chia and flax eggs are the most eggy and they both gave the best consistency for the recipes. That say, use your discretion. What ever you use will change the taste of your food. This means use a replacer that makes sense. If you don't think banana goes with your recipe, don't use banana as the replacer. Easy as that.

Cookie #3: Lemon Sugar Cookies * Chia egg replacer
Adapted from Light-Hearted Everyday Cooking
- 1/4 margarine, softened
- 2/3 cup granulated sugar
- 1 chia egg (1 tsp ground chai seeds and 2 Tbsp water)
- 2 Tbsp lemon juice
- 1 1/4 cup flour
- 1/3 cup whole wheat flour
- grated rind of 2 lemons
- 1/2 tsp baking soda
- 1 Tbsp granulated sugar

Preheat the oven to 350 F. Make your Chia egg, combine the chia seed and water in a small bowl. Whisk then let sit for a couple minutes. Whisk again until it forms an eggy texture.


In a large bowl, cream the margarine and sugar with an electric mixture. Combine the chia egg and lemon juice and beat until fluffy.


Combine the dry ingredients together (flours, lemon rind and baking soda). Pour the dry into the wet and mix until combined. Shape Tbsp sized amounts of dough into balls and place on a cookie sheet. Using a fork, flatten the balls and then sprinkle the remaining sugar. Bake for about 10 minutes and then let cool for another 5 and transfer to a plate. Makes 30 - 40 cookies.


Cookie #4: Oatmeal Raisin Cookies * Apple sauce egg replacer
From Cookie Madness via James Frederick (Thanks James!!)
- 3/4 cup whole wheat pastry flour (3.25 oz)
- 1/2 teaspoon baking soda
- 1/2 scant teaspoon salt
- 1/2 teaspoon cinnamon
- 1/2 cup light brown sugar (3 ½ oz)
- 1/4 cup granulated sugar
- 2 tablespoons maple syrup
- 1/4 cup applesauce, drained on a paper towel
- 1/4 cup vegetable oil
- 1/2 teaspoon vanilla
- 1 1/2 cup rolled oats
- 1/2 cup raisins, plumped and patted dry
- Walnuts chopped

Preheat oven to 350 degrees F.

Mix together the flour, baking soda, salt and cinnamon. Set aside. Mix both sugars, maple syrup, apple sauce, oil and vanilla together in a medium bowl. Add the flour mixture and stir until blended. Stir in the oats, followed by raisins. Let sit for 10 minutes.

Drop by rounded teaspoonfuls onto the cookie sheets. Bake for 12-14 minutes. Let cool for about 5-8 minutes on cookie sheets then carefully scoop up onto a wire rack. Makes 2 dozen.


So, what did I learn from all this? First, I love cookies and they make a great Sunday dinner. Second, there is a very simple formula to making a decent cookie. Cream fat with sugar, add bonding agent and wet ingredients, then mix the dry ingredients into the wet and bake. Presto - Cookies. I also learned the egg replacers are easy and only seem weird because I hadn't tried them before. You would have thought I learned my lesson about this already... I think this time I have!


What's your favourite cookie recipe?

One Long Cookie Night! Part one: The not so healthy

It seems like it has been forever since I made a recipe for the angry-vegan. I have been craving cookies for a while. I have also been promising an awesome post on cookies for a while... So... Here it is! Welcome to what was once cookie day, but now it is cookie night! I dedicate this to all the night owls out there... looking for something to do while the rest of the world sleeps.

One of my favourite things to do at night is cook. Weird? Maybe, but I find that as soon as I start something that requires me to stay awake, I start to want to sleep. It is a weird little mind-game that I play.

Tonight is no different. I planned to take this day for myself. Stay home and get a few things done while baking a few dozen cookies. Somehow day turned to night and here I am, nowhere near ready to sleep and needing something to do.

Part of my cookie challenge was to find a different egg replacer for each recipe. Egg replacers are very new to me. I have been avoiding them because I don't understand them. After a bit of research I learned not only do I use egg replacers all the time, but they are insanely easy to work with. Here are some egg replacers I have discovered:
  • Apple sauce
  • Banana
  • Flax egg
  • Chia egg
  • potato water
  • mashed potato
  • commercial egg replacer
  • soy milk and vinegar
  • Silken tofu
With all these choices out there, why even bother buying eggs?? If you know anyone trying to cut down on cholesterol, then urge them to try one of these. An easy way to cut back. Lucky for me, vegan diets are essentially cholesterol free. I used to think eggs were a magic food. You can do so much with them and nothing can replace them. I will admit for the first time... I was so wrong!

OK. Let's get down to business here... the cookies.

Cookie # 1: Rum-Nog Cookies *Cornstarch egg substitute
Recipe from Vegonomicon
- 1/3 cup canola oil
- 1/4 cup soy or rice milk
- 1 cup + 2 Tbsp granulated sugar
- 1 Tbsp molasses
- 2 Tbsp dark rum**
- 1 1/2 tsp vanilla extract
- 1 1/2 cups flour
- 1/4 corn starch
- 1 1/2 tsp baking powder
- 1/4 tsp baking soda
- 1/2 tsp grated nutmeg
- 1/2 tsp ground cinnamon
- 1/2 tsp salt
1 1/2 chopped pecan

Frosting:
- 2 Tbsp vegan margarine, soften
- 2 Tbsp soy milk
- 2 dark rum
- 1/4 tsp vanilla
- 2 cups confectioners' sugar

Preheat the oven to 350 F and grease two cookie sheets

In a big bowl, combine the oil, soy milk, sugar, molasses,rum, and vanilla. Beat until slightly foamy. Mix the dry ingredients together then put dry into the wet and mix until a dough forms.

Roll the dough into balls (about a Tbsp of dough), then roll the balls in the chopped pecans and place on the baking sheets. Bake for 10 - 12 minutes. Remove from the oven and let cook on the sheet for 5 min then place on a rack.


Frosting: Use electric mixer and cream the margarine. Add the confectioners sugar and stir with a fork until it is crumbly. Beat in the milk, rum** and vanilla. It should look like a butter cream frosting.

**Note: I made these in two styles. One alcoholic and one non. For the the non-alcoholic version, in the cookies I substituted apple juice for the rum and in the frosting, I just took it out.


If you like rum, you will like these cookies. If you don't substitute because they are still seriously good.

Old School Chocolate Chip Cookies * Flax Egg Substitute
Adapted from Crisco's recipe
- 3/4 cup Crisco vegetable shortening
- 1 1/4 cup brown sugar
- 1 flax egg (1 tsp ground flax and 2 Tbsp water)
- 2 tbsp soy milk
- 1 tsp vanilla
- 1 1/2 cup flour
- 1 tsp salt
- 1 tsp baking soda
- 1 cup of chocolate chips
- 1/2 pecans

Easy recipe. Preheat the oven to 375 F. In a small bowl, whisk the flax and water together and let sit for 2 minutes. whisk again until it has an eggy texture.

Mix together the shortening and brown sugar with an electric mixer until creamy. Add the milk, flax egg, and vanilla and mix again for 1-2 minutes.

In a separate bowl mix the dry ingredients together. Pour the dry into the wet (I do this in three batches) and mix until absorbed. Stir in the chocolate chips and chopped pecans (optional).

Spoon Tbsp size dough balls on to the cookies sheets and bake for 8 - 10 minutes. Let cool on the sheet for about 5 minutes and then transfer to plate.

If you want to make these a bit more adult, add in 1-2 tsp of instant espresso. Adds a lovely addictive quality. =)


Alright I think this is enough for one post. Coming next will be more cookies, but a little more healthy. Oatmeal raisin and Lemon sugar.

Friday, March 4, 2011

Green Monsters Approaching!


Today was a pretty good day. See Magazine in Edmonton did a feature on vegans in the city and I got interviewed for it. Very cool to see a feature on vegans in Edmonton. Thanks to See and Angela for posting my recipe and blog! Click the link to view the article See Magazine - The Joy of Cooking Vegan

I cannot believe I have not done a post on green smoothies yet! I think I have mentioned them in passing once or twice, but never devoted a post to them. I started making green smoothies after reading Oh She Glows. I have always loved smoothies and this looked like a really easy way to get a few servings of veggies before 8:00 am.

The basic recipe:
- 1/2 to 1 banana
- 1 cup milk (any kind)
- 1 cup spinach, or kale
- Tbsp flax or chia seed
- ice

Throw it in a blender and blend until smooth. Add more milk if it's too thick.

Angela Liddon who created oh she glows has started a site devoted to the green monster: http://greenmonstermovement.com/. Check it out, there are lots of variations.

I usually put something with some vitamin c in it.. Apple sauce, lime juice, orange juice. Whatever is on hand.  If I use kale, I steam it first. Otherwise Kale can give a green smoothie a gritty texture. Nothing wrong with it, but some people may find it off-putting.

My favourite way to make a green smoothie right now, take the basic green smoothie recipe above and add:
- 1/2 avocado
- 2 Tbsp of cocoa powder
- 1 tsp sweetener (I use maple sugar)
- replace 1/2 of the milk with coconut milk
- 1.2 tsp vanilla

Warning: Adding cocoa or fruit can make a green smoothie look kind of... icky.. Pay no attention to this. Just because red or brown doesn't make a nice colour when mixed with green; doesn't mean the flavours won't work!

I now have green smoothies at least three times a week. They are easy, portable, tasty and good for. How often does that happen? Since starting them, I notice I can focus a bit better, and my energy levels are up.

Try them once, and I bet you'll be hooked. To prove my point - Even babies like them :)


Ben enjoying the euphoric green smoothie hangover


Wednesday, March 2, 2011

Eating out... Part II - Banff

I know I said I would get back on track with meal planning last week, but this did not happen. Not even close!


I was working out in Banff for five days, so I was able to re-test the creativity of hotels in this area. Those that know me are fully aware of my issues eating in hotels. I find that even when I let them know ahead of time that I am vegan, there is little to no thought put into what is served. Most meals are just meals with the sauce and meat removed or my favourite, roasted vegetables on grains.


I actually love roasted vegetables, but eat it for eight meals in a row and then see if you still love it!


I was staying at the Banff Springs Hotel and I was pleasantly surprised in the restaurant. I let my server know I was vegan and they had a whole printed menu available called the Life Style Menu. There were only a few options I could eat, but I can't tell you how welcoming it felt to walk in and not have to modify the menu or explain what vegan is.


They had a raw dish that was vegan, two vegan ones and a couple others that could have sauces swapped to make vegan. I heard there was a vegan cake on the menu too, but sadly I did not get to sample it. I guess I will have to go back!


Another thing that was very cool about the hotel is that if you join the president's club, you can add dietary requests to your account. This way when you go to the hotel, they are already aware and hopefully will plan accordingly. I was able to have soy milk in my room and at the meeting a planned for no extra charge.


OK enough about the Springs. All in all, it was much better than previous trips to the mountains meal-wise.


I also went and ate at The Eddie Burger + Bar. They have a make your own burger menu and it includes a pretty tasty veggie burger. I made my burger southwest style with avocado, salsa, red onions, lettuce and tomato. The burger was one of the messiest meals I have had in a while, but it was good. I am not sure if that was a homemade paddy or not, but it looked like one and had potato in it, which I really liked.


Eddie Burger Bar - Photo Credit: Urban Spoon

Another night I went out to Chaya and got some tasty udon noodle and umeboshi rice balls. It was a long day and this honestly was serious comfort food. Carbs, salt, warm. Yum. This restaurant is really affordable and also had some decent veggie sushi choices. I did not get to try even though the avocado rolls looked amazing!

Photo Courtesy of Urban Spoon

I got a great comment on a previous blog about writing on grocery shopping. Thanks Laura! That is what is coming next and maybe a new recipe. I have not forgotten that I need to make some cookies!


I love to hear other suggestions for post, email or send me a comment with ideas.